A journey into Radare 2 – Part 1: Simple crackme

Standard

Update (2020): Since writing this article, it has become, in a way, the go-to tutorial for learning radare2. Your feedback was amazing and I am very happy for the opportunity to teach new people about radare2.

A lot has changed since I wrote this tutorial, both with radare2 and with me. I am now, for several years, a core member in the radare2 team and a maintainer of Cutter, a modern, GUI-based, reverse engineering framework that is powered by radare2.

This is an updated version of the original tutorial. I will keep it updated every now and then to make sure it is up-to-date with the changes in radare2.

Enjoy!


Prologue

I was playing a lot with radare2 in the past years, ever since I began participating in CTFs and got deeper into RE and exploitation challenges. I found radare2 very helpful with many CTFs tasks and my solutions had shortened significantly. It’s also my go-to tool for malware analysis tasks such as configuration retrievals. Sadly, I believe that only few people are familiar with radare2. It might be because they’re afraid to break out of their comfort zone (IDA Pro, x64dbg, Ghidra, OllyDBG, gdb) or they have simply not heard of it. Either way, I honestly believe that you must include radare2 in your toolbox.

Because I got really enthusiastic about the project and I want more and more researchers to be familiar with it, use it and hopefully contribute to the project, I decided to create a series of articles and use-cases of r2. Since these articles aim to teach you the basics of radare2, its features, and capabilities, I’ll explain much more than you actually need to know in order to solve each task.

Welcome to IDA 10.0. (see radare2/doc/fortunes.fun for more fortunes)

radare2

radare2 is an open-source framework for reverse engineering and binary analysis which implements a rich command-line interface for disassembling, analyzing data, patching binaries, comparing data, searching, replacing, visualizing and more. It has great scripting capabilities, it runs on all major platforms (GNU/Linux, Windows, *BSD, iOS, OSX, Solaris…) and it supports tons of architectures and file formats. But maybe above all of its features stands the ideology – radare2 is absolutely free.

This framework is composed of a set of utilities that can be used either together from r2 shell or independently – We’ll get familiar with tools such as rahash2, rabin2 and ragg2. Together they create one of the most powerful toolsets in the field of static and dynamic analysis, hex editing and exploitation (in the following articles I’ll dive deeper into developing exploits using radare2).

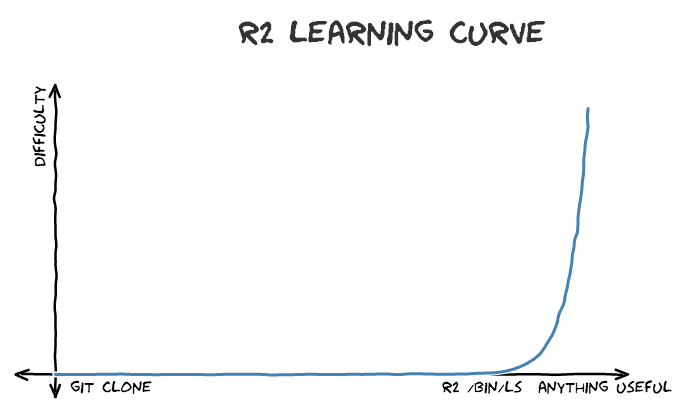
It is important to note that r2’s learning curve is pretty steep – although it has an amazing GUI called Cutter, which I co-maintain, it is still young to compete with more mature RE applications such as IDA or Ghidra. The CLI, however, including its Visual Mode, is still the core of radare2 and where its power lays. Because of its complexity, I’ll try to make things as clear and simple as I can.

This is more or less how r2 learning curve works.

Getting radare2

Installation

Radare2’s development is pretty quick – the project evolves every day. Therefore it’s recommended to use the current git version over the release one. Sometimes the release version is less stable than the current git version because of bug fixes!

git clone https://github.com/radare/radare2.git
cd radare2
./sys/install.sh

If you don’t want to install the git version or you want the binaries for another machine (Windows, OS X, iOS, etc) download the release from github.

Updating

As I said before, it is highly recommended to always use the newest version of r2 from the git repository. All you need to do to update your r2 version from the git is to execute:

./sys/install.sh

And you’ll have the latest version from git. I usually update my version of radare2 in the morning, while watching cat videos.

Uninstalling

I Can’t think of a reason for you to uninstall radare2 so early in the article but if you do want to, you can simply execute:

make uninstall
make purge

Getting Started

[!] Download the first challenge from here.

Now that radare2 is installed on your system and you have downloaded the binary, we are ready to start exploring the basic usage of radare2. I’ll work on a Linux machine but most of the commands and explanations (if not all of them) would be the same for Windows machines and others.

Command Line Arguments

As most command-line utilities, the best approach to reveal the list of the possible arguments is to execute the program with the -h flag.

r2 -h

I won’t paste here the full output. Instead, I’ll point out those which I usually use in my daily work:

Usage: r2 [-ACdfLMnNqStuvwzX] [-P patch] [-p prj] [-a arch] [-b bits] [-i file]
          [-s addr] [-B baddr] [-m maddr] [-c cmd] [-e k=v] file|pid|-|--|=
 -            same as 'r2 malloc://512'
 -a [arch]    set asm.arch
 -A           run 'aaa' command to analyze all referenced code
 -b [bits]    set asm.bits
 -B [baddr]   set base address for PIE binaries
 -c 'cmd..'   execute radare command
 -d           debug the executable 'file' or running process 'pid'
 -i [file]    run script file
 -k [OS/kern] set asm.os (linux, macos, w32, netbsd, ...)
 -l [lib]     load plugin file
 -p [prj]     use project, list if no arg, load if no file
 -w           open file in write mode
Continue reading

[Pragyan CTF] The Karaboudjan

Standard

Description

The Karaboudjan | Forensics 150 pts

Captain Haddock is on one of his ship sailing journeys when he gets stranded off the coast of North Korea. He finds shelter off a used nuke and decides to use the seashells to engrave a message on a piece of paper. Decrypt the message and save Captain Haddock.

->-.>-.—.–>-.>.>+.–>–..++++.


.+++.


.->-.->-.++++++++++.+>+++.++.-[->+++<]>+.+++++.++++++++++..++++[->+++<]>.–.->–.>.

clue.zip


This was funny challenge, I struggled with that Brainfuck but all it was is just brainfuck. Nothing more, we don’t need it to solve the challenge. Sorry guys.

I downloaded the zip file which was encrypted, I then cracked it using “fcrakzip” and dictionary attack. And found that the password is “dissect“. Inside the zip was a pcap file with one packet:


That’s it, we got the flag 🙂

The flag was pragyanctf{5n00p_d099}

[Pragyan CTF] Interstellar

Standard

Description:

Forensics 150 pts

Dr. Cooper, on another one of his endless journeys encounter a mysterious planet . However when he tried to land on it, the ship gave way and he was left stranded on the planet . Desperate for help, he relays a message to the mothership containing the details of the people with him . Their HyperPhotonic transmission is 10 times the speed of light, so there is no delay in the message . However, a few photons and magnetic particles interefered with the transmission, causing it to become as shown in the picture . Can you help the scientists on the mothership get back the original image?

transmission.png

We are given with a photo, I opened it in Photoshop and saw that parts of it are transparent.


I grabbed Python and removed the Alpha layer from the image. The Alpha layer controls pixels’ transparency.

from PIL import Image
Image.open('transmission.png').convert('RGB').save('output.png')

We got the result with the flag:


The flag was pragyanctf{Cooper_Brand}

[H4CK1T 2016] v01c3_0f_7h3_fu7ur3 – Australia Writeup

Standard

Description:

v01c3_0f_7h3_fu7ur3 – Australia – 300 – Network
The captured data contains encrypted information. Decrypt it.
http://ctf.com.ua/data/attachments/wireshark_8764d640d217fd346e2db2b5c38dde13.pcap

The first thing I do when I face a pcap challenge is, of course, open it in Wireshark. If it looks normal (and not, for example, Bluetooth traffic) I then run ‘foremost‘ on the file. ‘foremost‘ is searching for a known files in a given file by file headers, footers etc, and then extract it to ‘output’ folder in the directory.
So foremost found several files in the PCAP from several sources like http and ftp traffic

  • png
  • gif
  • jpg
  • rar
  • (…)

I opened the rar archive and found a file named ‘key.enc’ which contained “Salted_<GIBBERISH>” . I opened it in hex editor:

h4ck1t_australia_1

At the first, as the name says, I thought I found the key of some encryption and now I need to find the encrypted file and the cipher. But in a second thought I said to myself that ‘*.enc’ is usually for the encrypted files! So that file isn’t a key, it’s encrypted and we need to decrypt it. But what is the key and the cipher?

So, I figured out that file that starting with “Salted_” is file that was encrypted using ‘openssl’ application.
I then went to read the task again, I saw that the name of the challenge is “v01c3_0f_7h3_fu7ur3” so I thought maybe it involves some audio. Searched for ‘mp3’ or ‘aud’ in the pcap (queries: ‘tcp contains mp3’ , ‘tcp contains aud’) and found the following url:
http://priyom.org/scripts/audioplayer.min.js

It’s an innocent javascript file. I entered the “priyom” site and read it’s description:

“Priyom is an international organization intending to research and bring to light the mysterious reality of intelligence, military and diplomatic communication via shortwave radio: number stations”

Sounds interesting. So I looked up again in the pcap and saw a request to this specific url:
http://priyom.org/number-stations/english/e06

There is a robotic voice that reads out numbers.
75975975948648631317369873698599905999017212172126397363973486486313100000

So I now have what seems like a key, so what is the encryption?
A bit research about the encryption made me think it’s AES so I ran:

openssl aes-256-cbc -d -in key.enc -k <the long key>

-d is for decrypt
-k is for keyphrase

Failed. So I read about the structure of the voice record in the website and took only the Message part from the numbers: 7369859990172126397300000
this is the actual Message part (5-digit paired groups) and 5 zeroes at the end. without the Intro, Outro, Premable, Postmable and the Duplicate 5-digits.

Failed again. Tried it with all the possible openssl  encryptions (20+) but failed again.
So I got mad and tried to decrypt it using all possible encryptions with all possible substrings of the original number from the record.
Pseudo code:

for sb in all_possible_substrings(key)
{
	for enc in all_possible_encryptions:
	(
		openssl encr -d -in key.enc -k sb
	)
}

And how it was really looks like:

h4ck1t_australia_2
it took 30 minutes to run.
BUT FAILED. No flag.

At this point I think that 3 or 4 teams already solved it.
So I tried more and more combinations and this stupid one finally worked:

Megabeets:/tmp/h4ckit/australia# openssl aes-256-cbc -d -in key.enc -k 75948631736985999017212639734863100000
h4ck1t{Nic3_7ry}

It’s the full number from the recording but delete the duplicates pairs (the recording was splitted to group of numbers and the speaker said each group twice or three times).

So the hardest part was actually to figure out the exact keyphrase, the rest was pretty easy.

Flag: h4ck1t{Nic3_7ry}

[CSAW 2016] Clams Don’t Dance Writeup

Standard

Description:

Find the clam and open it to find the pearl.
out.img

We are given with a file. I ran file command on it to figure it’s file type:

[Megabeets] /tmp/CSAW/clam# file out.img
out.img: x86 boot sector

Ok, we have raw image file which will probably contain file/s with the flag. I’ll show 2 methods, choose your preferred one.

Method 1: Autopsy

Open Autopsy (my favorite forensics software, it’s free and heartily recommended) and choose the “Create New Case” on the Welcome window. You can also create a new case from the “File” menu.

autopsy_open

Fill the requested details and press “Finish”. Now add input data source to the case. Click “Case” > “Add Data Source…” or on the “Add Data Source” button (  autopsy_add_data_source ) on the main window and choose our file, out.img.

I cannot teach you about all the features of this great software so I’ll just show the path to the flag. If you’re not familiar with Autopsy I recommend you again to start working with it.

In the right panel you can find plenty of features, I will use only the directory viewer. Clicking on the data source (out.img) will show the files in the main directory of the image.

autopsy_view_dir


Do you see it? As it says in the description, we found the clam(.pptx)! The X on it’s icon means that this file was deleted from the  operation system (but not from the disk). Double clicking it and you’ll see bunch of image files, one of them, called image0.gif, is looking like a MaxiCode. Is it?

clam_image0

Scan it either online or offline to reveal the flag. I was scanning it with this site.
flag{TH1NK ABOUT 1T B1LL. 1F U D13D, WOULD ANY1 CARE??}


Method 2: Foremost

This is less elegant way to solve the challenge. Run foremost on the file:

[Megabeets]$ foremost out.img

You’ll get a folder named output with zip file, movie file and pptx file. Extract the pptx file using 7-zip (PPTX is an archive file), go to the /ppt/media folder and you’ll find the MaxiCode image mentioned before.